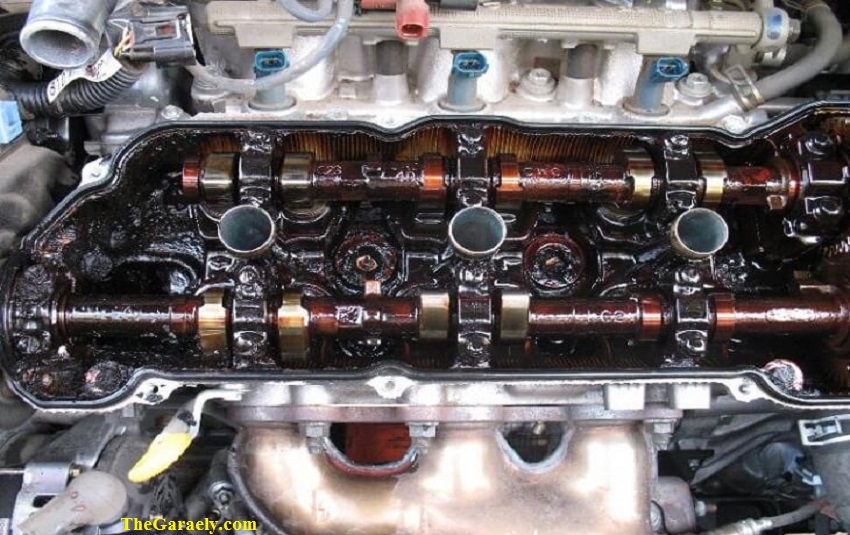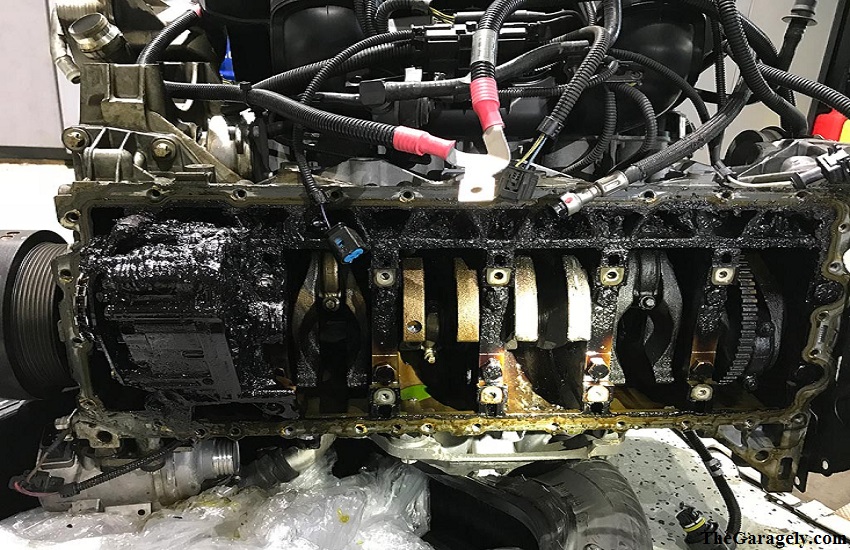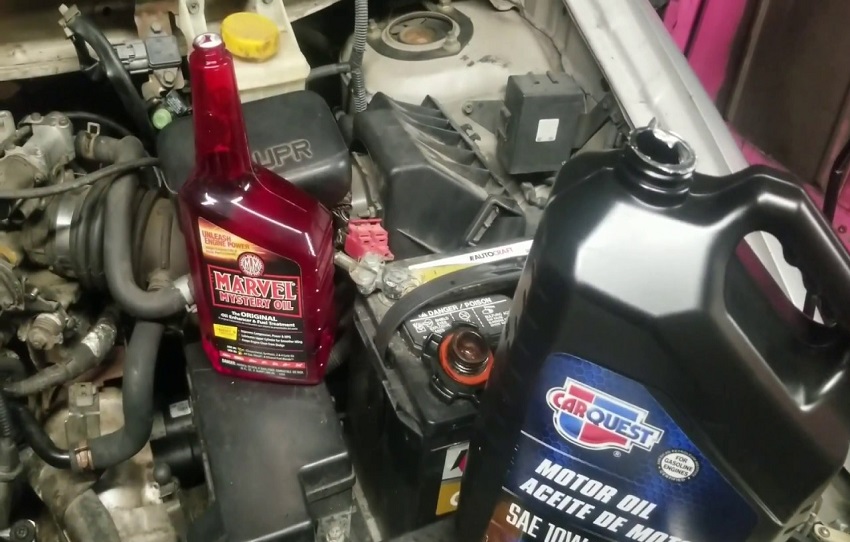
An engine oil flush is essentially the process in which a mechanic or the oil change technician add chemicals in the engine oil in order to break down the carbon deposits or sludge from old oil. In other words, it means to remove the gunk in your engine.
This process only takes place after the old oil is drained and before the new oil is added. Chemicals are added into the engine between the two processes, after which the vehicle is idled for some time to ensure the cleaning agent reaches every part of the engine to help in dissolving the sludge. Eventually, the chemicals will be drained.
Read More: Best Oil for Jeep 4.0 Engine
Recommended Engine Treatment Products!
Quick Navigation
- 1 This process has the following benefits:
- 2 How Necessary Is An Engine Flush?
- 3 When to Do an Engine Flush
- 4 How to Perform the Engine Flush: Step By Step Guide
- 5 The steps involved are discussed below:
- 6 Step 1: Adding the Engine Flush Treatment
- 7 Step 2: Allowing the Flush Treatment to Run through the Engine
- 8 Step 3: Draining the Oil
- 9 Step 4: Changing the Oil Filter
- 10 Step 5: Add the New Engine Oil
- 11 Step 6: Close the Oil Cap
- 12 Watch this video review on Best Way to Flush Engine Oil
This process has the following benefits:
- – It’s a preparation process for the addition of new engine oil.
- – Helps to increase fuel efficiency.
- – Helps in the reduction of emissions
- – Helps reduce the engine temperature
How Necessary Is An Engine Flush?
Flushing the engine can greatly help in removing the sludge and other gunk from your vehicle’s engine, therefore returning your engine to almost-new working condition. Although it might be of great help, the process is being discouraged by car manufacturers, especially for the newer models. This argument is that if your engine gets to the point of needing an oil flush, then the owner has done a bad maintenance job.
Car manufacturers are ensuring to include specialized maintenance service standards and products to ensure the longevity of engines. Mechanics and oil change technicians also advise on the regular oil change, which will reduce the need for an engine flush. Most of the vehicles that require an engine flush are the ones that are out of service or in very bad conditions.
Although an engine flush can be very helpful, sometimes it can lead to the buyer incurring even heavier costs than initially planned. This is simply because the sludge in the engine may be the only thing keeping your engine oil from leaking or seeping through the old worn out seals.
This is very common, especially in older engines with high mileage. It will probably be a bad idea to try a fix a poor working engine without first installing new seals and correcting other engine defects.
Despite all these, sometimes it necessitates you to do an engine oil flush for one reason or another. These instances are very few nowadays but are still necessary sometimes.
#Buy Best-Seller Engine Flush from Amazon
When to Do an Engine Flush

There are a number of signs/symptoms that will alert a car owner about the presence of excess sludge in the engine and therefore an engine flush. Although you can also see the sludge by shining a flashlight into your engine, the following are the most obvious signs:
– The oil warning light remains on ON position even when driving.
– Valve tappets or hydraulic lifters that are quite noisy
– Oil pressure that is very low
– The presence of dark greasy sludge on the oil filter or rocker cover
– Oil that drains too slowly after the drain plug is removed.
How to Perform the Engine Flush: Step By Step Guide
Sludge normally starts to form if a vehicle covers a mileage of more than 7,000 kilometers without servicing and oil change. If your vehicle’s engine has accumulated a lot of sludge, the steps involved in successfully removing it to restore the engine back to working conditions are quite simple and DIY.
For the engine flush, there are a number of things that are necessary to have including:
– Engine flush treatment
– New engine oil
– Container to drain the old oil into
– A new oil filter
– An oil filter wrench
– Pressurized air, which is optional
The steps involved are discussed below:

Step 1: Adding the Engine Flush Treatment
Park your car in a safe and relatively flat area and bring the engine to full operating temperature. The oil and the treatment will flow through the engine more easily at this temperature. Open the hood of the vehicle, trace the engine oil cap and remove it. As stated in the directions of use on your preferred engine flush treatment, pour the necessary amount into the engine. Then, return the engine oil cap and tighten it and close the hood.
Step 2: Allowing the Flush Treatment to Run through the Engine
After successfully adding the required amount of engine flush treatment and closing the hood, start your vehicle and let it idle for about 10-15mins. The length if idling will depend on the severity of the sludge in your engine. The additive in the treatment is a stronger detergent that will thoroughly clean your engine.
Step 3: Draining the Oil
This step should be performed when the engine is still hot. Once the time limit is reached, turn off the engine and drain the oil. Just remove the drag plug in the oil pan and let the oil and sludge flow into the designated container. Let this step occur without rushing. For better results, you can also use pressurized air to flush out sludge and other dirt.
Step 4: Changing the Oil Filter
Before you can add new oil to your engine, it is important to install a new oil filter. Loosen the oil filter using the oil filter wrench and allow for excess oil to drain. The oil filters vary from one vehicle to the next and some, such as the cartridge filter can be changed as you drain the old oil. For some, you have to wait until the oil is drained before you change them.
Take the new filter, add some clean oil to the filter gasket, install it with only your hands and then tighten it. After this reinstall the drag plugin back to your engine.
Step 5: Add the New Engine Oil
The engine oil used should meet the grade, rating, and weight of your vehicle as directed by the manufacturer. Simply pour the oil into your engine slowly while using the dipstick to check the level of oil to avoid overfilling.
Step 6: Close the Oil Cap
Once you’ve successfully added the new engine oil in your engine, place the oil cap back on and turn it accordingly to shut it tightly. After that, close the hood of the vehicle and the work is done.
Engine flushing is an easy task that can be done at home. This doesn’t mean that you should engage in the process often. Before you carry out the flushing, consult with your mechanic or engine oil change technician or visit the manufacturer’s service manual on matters relating to engine flushing.
Buy Top-Rated Engine Oil
Leave a Reply