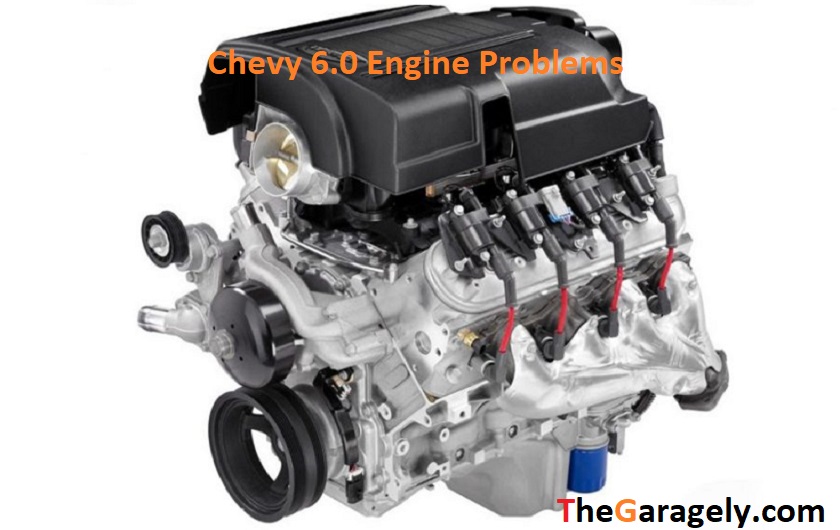
The Chevy 6.0 engine is just one of the many generations of engines manufactured by Chevrolet, popularly known as Chevy. It came out in the year 2010 and is a durable gas engine that is suitable for heavy-duty driving. However, similar to any other car engine, Chevy 6.0 too might develop some technical problems over a long period of usage.
[Read more…] about Chevy 6.0 Engine Problems Solution- All Problems Discussion & Solveblog
How to Use an Oil Extractor in 2023 (A Step by Step Guide)
Draining old oil from your vehicle’s engine is a task that is dreaded by many car owners because it takes a lot of work. However, with an effective oil extractor, you can transform this tiresome work into a cakewalk!
You won’t have to visit the repair shop every time your oil needs changing because these tools make it so easy that you can do it all by yourself! It’s fine if you’ve never done it before because we’re here to tell you exactly how to use an oil extractor like a professional! Keep on reading for an in-depth guide!
Why Use Oil Extractors?
You can’t change your old oil without draining the engine of your car, lawnmower, or other motor vehicle. Usually, every time you have to change your oil, you’d have to go to the repair store. This can be a nuisance and a waste of money as well.
But if you’ve got an oil extractor, the whole changing oil process becomes easier. You can completely drain your vehicle’s engine without additional help right inside your own garage! The best thing about it is that you won’t have to raise the car. This eliminates the need to take your vehicle to the mechanic store.
Draining oil is usually a messy task, but that’s been changed with the invention of these fluid evacuators as they offer a far less messy solution. This machine can be a lifesaver during emergencies where help is hours away.
With it, you can save yourself from trouble by doing everything yourself! This tool comes as a blessing to those who live in colder climates — because it’s great at extracting oil out of snowplows and snowblowers! Oil extractors can be a great addition to your garage and help immensely in vehicle maintenance. The only drawback is, in most cases, these things leave about 5% of the old oil in the engine.
Manual Vs Pneumatic Vs Electric
Before we move on, it’s important to know that there are three types of oil extractors that you can use because each one functions slightly differently.
- Manual
The old-fashioned manual fluid extractors use your raw energy to extract the oil instead of relying on the engine and electricity. You have to pump manually in order to get the suction started and drain the oil. It’s the cheapest option but also the most tiring. However, you will get some exercise out of it, which is a good thing, right?
- Pneumatic
Pneumatic oil extractors are the most common types in the bunch, as they can be powered manually or electrically. For automatic pumping, these extractors make use of air compressors. When electricity is unavailable or the air compressors malfunction, the manual mode kicks in so that you can pump out the oil using your hands.
- Electric
The most convenient types are the electric oil extractors that offer quick draining without any issues. They come with powerful engines that are powered by electricity to offer automatic pumping. You can completely rely on them to extract all the old and unwanted oil from your vehicle’s engine in no time without any manual labor!
Before Getting Started
Before we get to the fun part, you might be asking what you would need to extract oil out of your engine. Well, the good thing is, if you’ve got a decent oil extractor, then you’re all set to begin! If you don’t like creating a mess, you should get yourself a piece of cloth to clean the oil that might spill out. Trust me, when there is oil involved, some spilling is bound to happen!
Now that you’re ready to get your oil extractor out of the package, start assembling it. Assembling usually means screwing on some caps and connecting certain tubes, which should be pretty easy to do by following the instruction manual.
How to Use Oil Extractor: The Guide
Warming Up the Engine for making the extraction process easier, you’re going to have to warm up the oil. We mean warm, not hot! That’s because warm oil tends to flow easier without clogging up.
So, go ahead and turn your vehicle’s engine on and let it run for around five to ten minutes before turning it off. Now, the engine oil should be just about warm enough to flow easily without burning your hands. You still shouldn’t touch the oil either way! The Extraction
Step 1: Removing the Dipstick
Reach for your vehicle’s dipstick and remove it gently. Make sure to store it safely so that it doesn’t get dirty. The best way is to wrap this thing up in clean paper towels.
Step 2: Inserting the Long Tube
Your extractor should come in a long tube. See it? Good, now pick it up and insert it into the dipstick hole. Feed it all the way in until you feel it reaching the very end.
Step 3: Connecting the Electric Oil Extractor
Now, if you’ve got an electric oil extractor, connect the other side of the tube to a container that is disposable. That’s where your old oil will be stored instead of spilling onto the floor.
Step 4: Forming a Connection
Using a clamp, form a connection between the extraction pump and your car engine. This way, the oil extractor will draw electricity from your vehicle to run.
Step 5: Starting the Pump
This is the part where you start the pump. Once started, you’ll begin to see oil coming out of your vehicle through the tube and getting transferred into the disposable container. Now, let the extractor run for ten to twenty minutes to drain your engine completely. How long it takes to drain oil depends on the type of vehicle as well as the efficiency of the fluid extractor itself.
After a while, you’ll notice air bubbles forming on the tube and hear noises that you usually hear when you’re sipping the last bit of soda using a straw. That’s what happens when the machine’s almost done extracting.
Step 6: Turning the Extractor Off
Now, you can go ahead and turn the extractor off. Take the tube off as well, as you’re all done. Your vehicle’s engine should now be ready to accept new oil!
For Manual Extractor
In case you’ve got a manual extractor, the procedure is almost the same, except you won’t have to connect the extraction pump to an electrical source. Instead, all you’d have to do is give it a good amount of manual pumping to get the suction started!
Finishing Touches
Get rid of the extracted oil that should be in your container. Don’t throw them away but instead try to recycle. Most motor oil stores are more than willing to buy them. Make sure not to harm the environment in any way! Don’t forget to put the dipstick back into the dipstick hole once you’re all done.
The process of oil extraction should be a piece of cake if you follow these instructions. You can save up a lot of money and time by minimizing the visits to the repair stores as you can do the extracting without relying on external help! Just make sure to use the right tool!
The Right Way to Do It
Although the whole process is very easy, there are some ground rules that you should follow to get the most out of it. The very first thing to do is pick a first-rate oil extractor. If you opt for a trashy product, you won’t be able to drain as efficiently as you want.
Besides, it might get ruined after a couple of uses. It is important to keep patience because the process might take some time to end. You don’t want to half-bake the task because it will backfire in the long run. Make sure the oil is drained completely before turning the machine off or stopping pumping manually. Electrical tools are the easiest to use because they don’t require any manual force.
However, they are useless without electricity. So, if you decide to use electrical ones, make sure to keep a source of power ready, especially for emergencies.
Safety Guidelines
It never hurts to be a little bit cautious, especially when you’re working with machinery.
- Remember to warm up the oil before changing because cold oil can clog up and doesn’t flow as smoothly
- Refrain from touching the warm oil because it can still damage your skin
- You can wear safety gloves for saving your hand from getting damaged by an unwanted oil spill
- Always have rags ready to clean the spilling oil
- You would be wise to have extra containers ready in case the container you’re using fills up before the engine’s completely drained
Final Words
Oil extractors are amazing tools that offer a lot of convenience for every vehicle owner. You can easily perform the task of draining oil by yourself, even if you’re a complete beginner. Our extensive “how to use oil extractor” is designed to contain all the information and instructions to help you out in taking the task upon yourself.
Why go to repair stores frequently and waste your money when you can do it all in your own garage? That’s exactly what these tools offer!
How to Clean Chrome Rims That Are Pitted
Cleanliness can make a huge difference in anything whether it is your car, your house, or yourself. It is very important to maintain your car in good condition. Thus, cleaning the car tires and rims is extremely important. A common question that might come to your mind as a car owner is, how how to clean chrome rims that are pitted. You might be looking for at-home remedies that can clean chrome rims or you would be interested in finding out the ways through which you can get rid of the unwanted rust on your chrome rims.
If you are searching for this kind of information like car maintenance, battery & power solution, auto tools & equipment, you are in the right place! Read on for more information.
How to Clean Chrome Rims That Are Pitted
Nobody likes the chrome rims that are pitted. If you find yourself in such a position, it is important to take action as soon as possible. However, you would need a little help.
Things You’ll Need:
- 000 fine steel wool
- Warm Water
- Dish Soap
- Cotton Cloth
When chrome rims are exposed to air, they would pit easily. The best way to clean pitting from the chrome rim is to sand it. However, there could be a need for repair if the damage is much more. You have to maintain the tires and rims by keeping a close eye on it. Consider the following steps:
- Use warm water and dish soap. Wash the rim with it. By using a cotton cloth, dry it. Use 0000 fine steel wool. Rub in a circular motion to remove the pitting. Before using it, you have to make sure it is suitable. You can use your fingernail to check the pitting.
- Use a lacquer and spray a light coat. Pat dry after using 0000 fine steel wool. You can use the second coat of lacquer. Make sure you dry the item. This should be in an area that is well ventilated.
How to Clean Chrome Rims with Vinegar
Vinegar is not only used as a food item but it has a variety of other uses as well. You can get rid of tough stains with the help of vinegar. Try the following to clean the chrome rims using the help of vinegar.
Things You’ll Need:
- Vinegar
- Water
- Soft Sponge
Thus, in order to clean the chrome rims using the vinegar, consider the following steps:
- Mix one part of vinegar with one part of water. The amount of water you use would depend on the amount required for the cleaning purpose. In any case, try to keep the ratio the same. Don’t dilute this solution. Make sure there are equal parts of both water and vinegar to make an effective solution.
- You can use a soft sponge to clean the chrome rims using this solution. Don’t try to use any brush or hard material as it is likely to leave scratches on the surface.
How to Clean Chrome Rims with At-Home Remedies
The home remedies are not just for making your skin shiny and bright. The home remedies are not confined to the items you prepare at home to lose some weight. You can use the at-home remedies to clean the chrome rims.
Things You’ll Need:
- Baking Soda
- Water
Thus, consider the following steps to clean the chrome-rims using the home remedies:
You can mix water and baking soda in such a way that a paste is formed. You can use this paste to clean the chrome rims. This is an easy technique that would assist you in cleaning the chrome rims.
There are many other home remedies that you can try. For example:
Aluminum Foil Method
Things You’ll Need:
- Aluminum Foil
- Water
Using this particular aluminum foil method, you would be able to clean your chrome rims in the following ways:
- Take a piece of aluminum foil from your kitchen’s cupboard.
- Dip this particular piece of aluminum foil in water. Now start rubbing it on the chrome rims, it would assist in getting rid of the unwanted rust. Try it and see the results!
How to Clean Chrome Rims with Steel Wool
As discussed previously using 0000 fine steel wool you would be able to clean chrome rims. The rest of the method is mentioned previously. It is wise to follow the relevant instructions to clean the chrome rims. There are also tons of tutorials available online that can provide a step by step guide on how to use a certain product. Make sure you are following the instructions carefully. If you find it tough to maintain the chrome rims and clean them on a regular basis, it would be a good idea to let an expert do this kind of job for you!
How to Clean Chrome Rims Brake Dust
You have to clean the chrome rims when there is an issue. Make sure you are following the appropriate method.
Things You’ll Need:
- Soap
- Water
- Dish Detergent
- Hose
- Small Hand Brush
Consider the following steps to clean chrome rims brake dust:
- In order to clean chrome rims brake dust mix water with soap. Add dish detergent to this mixture. Now, quickly stir this mixture.
- Using a hose, gently clean your tires. This would remove extra dirt and grease that is accumulated on the tires. By using the hose, you are doing your wheels a favor as there would be no need to go through the hassle of scratching it harshly for the cleanup.
- You can turn the hose to the jet setting if you are looking for some extra power to clean the chrome rims.
- You can use a small hand brush and dip it in the mixture you just made. Make sure you are scrubbing the brush correctly so that it would clean the chrome rims thoroughly. Use a good brush for this purpose so that you would be able to clean the chrome rims thoroughly.
- After cleaning it thoroughly, rinse it well and pat dry.
- You can repeat the scrubbing process as per your requirement or until you are satisfied with the end result
How to Clean Oxidized Chrome Rims
Oxidation is quite common with the chrome rims. If the chrome on your rims is of great quality it would avoid the oxidation. However, you don’t like the rust and want to get rid of it as soon as possible. In order to get the oxidation off from the chrome rims, read on.
Things You’ll Need:
- Soap
- Water
- Steel Wood Pad
- Toothbrush
Thus, consider the following steps to clean oxidized chrome rims:
- Just like always, make a mixture of soap and water. This mixture appears quite useful since you can use it in a variety of ways. Clean the chrome rims with this mixture. It would assist in getting rid of the dirt and grease if there is any on the chrome rims.
- Using a steel wood pad, you can remove the rust on the wheel. Use water along with it.
- You might be wondering what to do with that used toothbrush in your washroom that had been sitting there for too long. Now is the time to put it to good use. Dip it in the mixture and clean the oxidized areas of the chrome rims. Make sure you are thoroughly cleaning it.
- In the end, use some clean water to get rid of the mess.
How to Restore Chrome Rims
Your chrome rims might lose their charm and you would need a little elbow grease to restore them. You can blame the rock salt for this damage. It would be a good idea if you keep a close eye on your chrome rims. It would be wise to clean the chrome rims weekly to keep them looking neat and shiny for a long time.
Things You’ll Need:
- Automobile Cleaner
- Water
- Sponge
- Toothbrush
- Cleaning Cloth
- Chrome Polish
- Spray Wax (automotive)
Thus, consider the following steps to restore chrome rims:
- You can buy any automobile cleaner from the market and mix at least four glass of water to it. The water should be warm.
- Use a clean sponge and clean the chrome rims. Using a toothbrush you can scrub the chrome rims. Scrub softly and in a circular motion.
- In order to avoid the spotting on the chrome rims, rinse it immediately. AT this point you can use cold water.
- Use a cleaning cloth and try to dry the chrome rims. You can apply chrome polish to the chrome rims and for this purpose, you can use another cleaning cloth. Make sure the cloth is free from lint. Apply the chrome polish as per your requirement so that you get the desired shine and result.
- In the end, you can use the automotive spray wax. The purpose of using the spray wax is to protect the chrome rims from the damage.
How to Clean Corrosion off Chrome Rims
You can use high-quality chrome rims for your precious vehicles. However, the truth is that you cannot avoid corrosion. They would rust at one point or the other. Thus, you should take appropriate measures when this happens.
Things You’ll Need
- Soap
- Water
- Scrub Brush
- Wire Brush
- Corrosion Remover
- Hard wax
Thus, consider the following steps to clean corrosion off chrome rims:
- Initially, like always you have to make a mixture of soap and water. Use this particular mixture to clean the chrome rims as this would assist in getting rid of the dust and grease.
- Dry the wheels and see for the signs of corrosion on the chrome rims. Try to get rid of the unwanted corrosion using the scrub brush.
- In order to get rid of the rust deposits that are quite large, you can use a wire brush. It would assist in cleaning the remaining rush on your chrome rims. However, don’t try to scratch the chrome as it would make the matter worse. All you have to do is try your best.
- There would be many products available in the market that can assist in getting rid of the corrosion. For example, you can buy a good corrosion remover for this purpose. Make sure you read the reviews and comments from current and previous buyers before making a final purchase decision. You have to follow the instructions on the package.
- In the end, you can apply hard wax to protect the chrome rims.
Important Points To Keep In Mind
When trying to keep the chrome rims clean and tidy, keep the following points in mind:
- Make sure you are taking the safety measures when using the products designed specifically for cleaning the chrome rims.
- Make sure you are wearing hand gloves when cleaning the chrome rims to protect your hands.
- It would be wise to wear a mask especially if you are allergic to some chemicals that would be used in the process of cleaning.
- Make sure you are following the instructions correctly.
- You can read reviews and comments on different products before making a final purchase decision.
- Keep a close eye on the chrome rims to avoid damage.
- Avoid contacting any chemical with eyes. It would be wise to wear goggles when cleaning the chrome rims.
Final Words
There are various ways to keep the chrome rims in good condition. It is important that you are aware of the various ways through which you can maintain the beauty of your vehicle. We are living in an era of modernization and information technology.
In such a busy world, it is important to take some time off to take care of the chrome rims. However, if because of any reason you are not able to devote some time to clean the chrome rims, it would be wise to take the job to a professional and let them do the cleaning for you!
[Read more…] about How to Clean Chrome Rims That Are PittedHow Much Does it Cost to Replace a Headlight Cover?
Thinking of Safeguarding Your Car Headlights?
With the best headlight cover, you can dress up your car, SUV or truck headlights and protect from weather elements. The right headlight cover also protects the headlight lens from stone chips, minor abrasions, and bug splatters.
As an aftermarket modification, it’s made from different materials. They include poly carbonate, metal, and self-adhesive vinyl. These materials help to reduce the light transmitted or tint the color of your headlights.
Want to know how to install the headlight cover and costs?
[Read more…] about How Much Does it Cost to Replace a Headlight Cover?Truth About Leveling Kits – 10 Secret Things You Didn’t Know
That’s why today we’ll be discussing these kits, and what they can do for you. By the end, not only will you be proud of how good your car looks, but you’ll also see why they’re such an essential part if you have any of the vehicles listed above.
Here are ten things you should know about the leveling kits.
The 10 Things You Should Know Better about Leveling Kits
Leveling kits are quite popular car parts that every vehicle owner should know about. That’s why, in the following article, we’ll go through every bit of information that will help us understand their purpose a little bit better. Hopefully, that will help us make the right decision during the purchase.
1. Proper Definition of a Leveling Kit
If you’re here, you probably know what a leveling kit is. But some people aren’t aware of what these tools can do. To clear any doubt, we’ll go through the basic definition. The most experienced drivers can skip this section and proceed to the next part of the article.
When you buy vehicles like trucks or SUVs, you may have noticed that they don’t have a perfect balance from the rear to the front. It is a fabric design that could be troubling during some circumstances.
A leveling kit is a set of tools that will help you level your truck with the rear suspension. Once installed, cars like trucks or SUVs will have that perfect balance throughout their structure, from the back to the front. And, once you have that, driving on tough terrain is quite easy.
But, before rushing to the car shop, there’s one more thing you need to sort out: is the leveling kit what you need exactly?
To clear any doubt, we’ll discuss the different types of leveling kits that you can purchase. Keep in mind that some may work better than others, depending on your purpose.
2. There Are Three Types of Lift Kits
With the number of vehicle models out there, it is only logical that one lifting method wouldn’t be enough for all of them. That’s why we don’t only get one, but three different types of lifting kits to match most of the cars out there.
Those are the leveling, suspension, and body lifting kits. Why do we say it covers most of the cars, but not all? Because some vehicles require their exclusive tools. Such is the case of the Chevy Silverado, which demands a unique type of kit that measures its components accurately.
In cases like the Chevy Silverado, it is better to check out with the manufacturer or a professional to confirm what your necessities precisely. If you’re wondering, the most noticeable difference between these three kits is the installation procedure. Let’s talk in-depth about the leveling kits.
-
Leveling Kits – Lifting between 1 to 2 Inches High
The leveling kits are everyone’s go-to choice to lift their rides between 1 to two inches, as the title suggests, and they work mostly for the front wheels. Their quality of performance is undeniable; when you need to increase your tire’s diameter, you will hardly find anything better.
Other purposes for these kits are improving both the towing, as well as the vehicle’s load capacity. The tools that fall under this category feature coil spring spacers.
But that’s not all of them, as some other leveling kits offer bar keys with forged tension. The first one, with the spacers, are the suitable choice if your vehicle uses a coil assembly. On the other hand, using the bar keys type is better for cars with a suspension system.
To sum up: the leveling kits level up the front wheels with the rear, allowing the vehicle to withstand heavier loads.
-
Suspension Kits
These kits work by lifting the entire suspension system of your vehicle, not only the front. When using this tool, you will have the opportunity to install larger tires on your truck, which allows drivers to go through complicated surfaces safely.
Also, since the suspension kit adds extra height to your vehicle, it is far more resistant against shocks, providing a smooth drive through many areas.
How many inches does the suspension kit lift? It may vary, but the standard is between four to six inches.
-
Body Lifting Kits
And, finally, there are body lifting kits. These tools are a set of blocks to help you raise the vehicle’s body from the frame. What does that mean? Well, when you lift the truck’s body, the frame stays in its place, maintaining ground clearance.
Each one of the lifting kits is suitable for specific circumstances. Make sure what you need is a leveling kit before making your call. Otherwise, you may end up wasting more money than needed.
3. Leveling Kits are An Investment Worth Making
Not everyone needs a leveling kit; more so, it is understandable that many people consider it is nothing but a method to make our vehicles look fancier. But, that’s far from the truth.
First, we have to admit the leveling kit does make the vehicles look better overall. By installing it, car owners are capable of adding larger tires to their ride, allowing our trucks to look intimidating.
If what you want is to show off, these additions are more than capable of helping you achieve that. But there’s another reason why you should invest in the leveling kit, and that’s safety measures.
You see, adding a leveling kit to your truck provides proper ground clearance. No longer will you have to worry about not being capable of driving through certain terrains without crashing the front side.
A leveling kit makes the frame and body of the vehicle sit in perfect balance from the back to the front. Driving through dirt or mudded areas shouldn’t be an issue anymore.
Moreover, the leveling kits are not that expensive. There are many of them available at different price ranges. Make sure to consider all of the options to find the one that meets your budget and matches your vehicle.
4. Materials Used to Produce the Leveling Kits
Picking just one from a sea of options could be challenging. But, you’ll know how to differentiate good from low-quality leveling kits if you take into consideration the materials used to produce them. One of the materials is billet aluminum. You could consider forged steel as well.
There’s one brand that has been putting outstanding leveling kits out there for the past years, and that’s ReadyLift. Their manufacturing process takes the best out of forged torsion keys and turns them into something else, ready for us to use in our trucks.
Forging torsion keys is essential if you want the best performance out of your vehicle. Not only does it allow a smoother rotation for the tension bar, but it works increasing the car’s torsional energy, as well as any force exerted for the keys.
If someone tries to sell you a generic leveling kit assuring it will fit your car, don’t fall for it. Every vehicle needs a specific type of leveling kit.
Also, if the manufacturer uses cast materials to produce the leveling kits, be aware that it will break eventually. It is just a matter of time. Furthermore, it is a poor-quality design that could put you in danger out there on the roads.
Cast materials are often weaker when compared to other pieces like OEM; their warranties don’t cover for most mishaps, and they come from the United States. We’re not saying that’s always a bad thing, but in this case, it is.
5. Choosing the Right Leveling Kit
With many options available, it could be complicated to sort out through all of the options to find the right one for our vehicle. However, there’s some information that may help you out. We’ll discuss it next in another segment in this article.
-
Choosing by Model
Leveling kits are not for every car. They are tools that suit specific types of vehicles that could use those extra inches of height, like SUVs and trucks. If you have any of these, then there’s a kit for you. Of course, trucks and SUVs aren’t quite specific either.
This is why you need to consult with both the car manufacturer or the kit producer to find out if they are both compatible. You can do some tests by yourself too. Do you need a suspension system?
Start by measuring the dimensions of your vehicle to determine the distance between the front and rear. Another measurement you could make is how far away is the center of the wheel from the top. After getting the dimensions, compare the statistics gathered.
The result is what technicians call the rake, which is the difference between the front and the back in height.
Sounds complicated? It isn’t. Let’s do a quick test here: after measuring, the length at the back could be 20 inches, while the front shows 18 inches. That means your rake is two inches, and that’s how much you need to level the front.
-
Choosing by Application on the Vehicle
Another method to pick the perfect leveling kit is knowing what to expect from it. If you’re all about finding the right level stance, then add a couple more inches on the front, and there’s that. You now have a perfect leveled up car with a smooth performance.
But what if I tell you that some drivers prefer to have a small amount of rake on their vehicles? They want it that way because it provides ground clearance without losing the space to install larger wheels.
If that’s what you want, use the leveling kits to add a couple of inches more on either side, back or front. Another benefit of doing this is that you’ll receive a higher towing capacity.
It all sums up to what you want to do with the leveling kit. Choosing the right one is decisive to get the expected results, so take as much time as needed looking at the different offers.
6. Correctly Installing the Leveling Kit
Once you get your hands on the leveling kits, it may be tempting to give it a try yourself. After all, they look like simple pieces that wouldn’t take too much time or effort to install, right? That’s partially true.
If you’re confident about installing the leveling kit after acquiring a lot of knowledge through YouTube videos, you’ll most likely succeed at doing it.
However, the tricky part may come after detaching everything. It is pretty easy to make a mistake assembling the pieces back, which could lead to an accident eventually.
Unless you have previous experience doing this procedure, it is better to consult and get assistance from a professional mechanic.
They will know how to disassemble and assemble back the pieces without any issue. Plus, they may shed some information you could use in case the leveling kit doesn’t turn out to be what you wanted.
Sure, paying a professional may be a little expensive, but consider all the money you’d have to spend if something goes wrong because we made a silly mistake. We should never underestimate the importance of having complete certainty and security while driving your vehicles.
7. Installing without Removing the Struts
In the past, it used to be very frustrating to install a leveling kit successfully. You would often find yourself having to disassemble everything, including the struts, only to assemble everything back after the installation.
Fortunately, that’s not an issue anymore. A lot of leveling kits will allow you to do the installation procedure without disassembling the struts of your truck. This is more convenient as it reduces the time and effort you’d have to put otherwise.
A clear example of that is the Rough Country brand, which produces high-quality leveling kits that are quite intuitive and user-friendly. Everyone gets to use their parts and install them properly without the hassle of disassembling your vehicle.
8. Alignment Issues after Installing
Installing a leveling kit has many benefits as we covered before, but some issues may take place before everything starts to run smoothly; a stiffy steering is one of them. If this happens, there’s no need to panic. It is a regular problem that you can solve quickly.
These issues take place regularly, and to solve it, it doesn’t take more than getting our vehicles to an alignment shop to get it fixed. There, the technician should have the proper tools to make your car function as it should. After that, you’ll be ready to enjoy your perfectly leveled truck.
While you’re there, make sure to let the technician know if there have been other issues after installing the leveling kit.
Perhaps you’re dealing with a minor problem that doesn’t seem that important because it doesn’t intervene with the car’s performance, but that same issue could become a risk along the way.
9. How Often Do You Need to Check the Leveling Kits?
It is easy to forget everything else when you’re out there on the road driving your vehicle, but it is always necessary to keep track of the car and the leveling kit’s performance to ensure there are no accidents.
Keep in mind that these parts are withstanding a ton of energy every day, which may result in loose bolts or nuts when you least expect it.
Ultimately, checking the nuts/bolts depends entirely on the vehicle owner’s preference, but it is better to check their tightness after driving beyond the first five hundred miles. It allows you to confirm everything is going as smoothly as expected, and make changes if necessary.
Then, you may want to check once again every thousand miles. It may sound excessive, but knowing that our vehicle is working as it should is one less concern in our minds.
10. What Other Things Should You Check?
A leveling kit shouldn’t take all of your attention when you’re inspecting the vehicle. Other features you want to check are the wheel alignment, the steering system, and the car’s suspension system.
The steering system is responsible for direction control when the vehicle is moving. After installing the leveling kit, inspect this feature to ensure it works smoothly. If there’s anything you don’t want to have on the road is an uncontrollable machine.
In case you’re an experienced driver with technical knowledge, you can inspect every one of these systems by yourself every three thousand miles. However, if you aren’t sure how these things work, it will be better to consult with a technician for a professional overview of your vehicle’s performance.
Another element you want to check regularly is the drive line system, responsible for pushing the vehicle either forward or backward.
This feature locates in the middle of the transmission and the vehicle’s drive axles, transmitting energy strong enough to turn the car’s wheels in either direction.
Remember, safety is always first. I know the safety measures have been rather repetitive throughout this article, but as long as it keeps drivers from making silly mistakes that could lead to an accident, it is all worth it.
Frequently Ask Questions About Leveling Kit
Here we have some of the most commonly asked queries;
Final Words
Having an unleveled truck may not seem like a big deal, up until you reach certain terrains where the front side crashes continuously against rocks and other things. It is at this moment that the leveling kit comes into play, as it allows you to sort out those problems quickly.
Choosing between the three depends on what you want to do and what kind of vehicle you have. It may seem tedious, but picking the right one makes a lot of difference.
After installing the leveling kits, you’ll quickly notice why many people like it so much. It makes everything better about your truck. An improved look and better performance are a couple of those benefits brought by the leveling kit.
Related post: 9 Best Head Gaskets for 6.0 Powerstroke